Servo Control with the Vespa

Introduction
Got your Vespa and want to know how to use it? Don't worry, we're here to help you with these first steps and to show you how to use the basic functions of the library developed for it.
In this tutorial you'll see how to control servomotors with Vespa, the behavior of each control function in the Vespa's library, and how it can be applied in practice.
List of Materials

Lista completa de produtos
comprar
Vespa
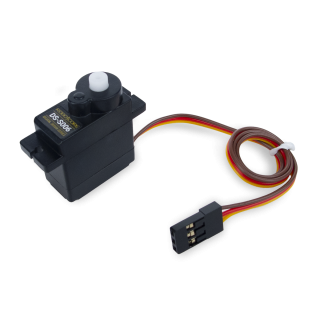
Micro Servo DS-S006

Potenciômetro 10kΩ

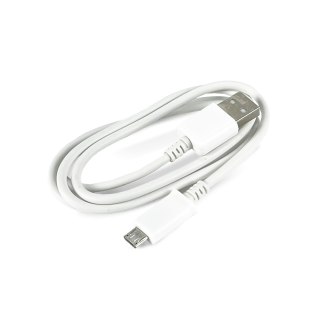
Cabo USB Micro B 80cm

Jumpers Macho-Fêmea x40 Unidades
Automatic Control
In this first project, we will develop an automatic control of servomotor axis position using the Vespa library functions, where the axis will go from its minimum limit to its maximum limit and vice versa repeatedly.
Circuit
For this first project, just connect the servo to the Vespa pin S1 as shown in the image below. The connection can be direct, just pay attention to the polarity.

Code
To control the servomotor, we will use the Vespa library, so to install it, follow the steps in the tutorial First Steps with the Vespa.
As a simple first servo control, we will make it move its axis from 0 to 180° and then from 180 to 0°. To do this, upload the following code onto your Vespa.
Understanding the Code
The code starts with the inclusion of the library "RoboCore_Vespa" and then the object servo is created as an instance of the library "VespaServo , which will be used to control the servomotor.
To finalize the global declarations of the code, we have the declaration of the constants MAXIMUM_ANGLE and MINIMUM_ANGLE, which store, respectively, the maximum angle (180°) and the minimum angle (0°) of servo movement.
In the code settings (function void setup()), in addition to starting communication with the serial monitor at 115200 bps, we also "connect" the object servo to pin S1 (ESP32 GPIO 26) through the function attach(), which is called in the code by the command servo.attach(VESPA_SERVO_S1). The VESPA_SERVO_S1 parameter is an internal definition of the library, which links this "word" to the ESP32 GPIO 26. To finish the code settings, the servo is driven to its central angle (90°) by the function write(), which is called in the code by the command servo.write(90).
In the code loop, the servo is controlled to move counterclockwise from 0 to 180° by a for loop, where, at each repetition, the angle of the servo is updated by the command servo.write(i) according to the value of the variable i created for the loop. Then basically the same thing is done again, but in the second for loop, the motor is moved clockwise from 180 to 0°.
What Must Happen
After uploading the code for the Vespa, you will see that the servo's shaft will start to move in both directions to its maximum and minimum limits, as in the GIF below. If you open the serial monitor with the speed 115200 bps, you will also see the angle update being used to control the servo.
Notice that, because of the mechanical limitations, the shaft movement won't be from 0 to 180º, but a little less of this range.
Manual Control
Now that we understand the basics of how to control servomotors with the Vespa, why not manually control the servo shaft to replicate the shaft of a potentiometer? After all, they have similar turning limits, so it would be possible to have great accuracy in positioning the servo shaft.
Circuit
For this project, assemble the following circuit.

Code
With the circuit assembled, upload the following code to your Vespa to control the movement of the servo shaft by the potentiometer, basically replicating it.
Understanding the Code
This code starts basically identical to the previous project, however with the declaration of some additional variables, being them POTENTIOMETER_PIN, which stores the GPIO number of the VP pin connected to the circuit's potentiometer; MAXIMUM_READING, which stores the maximum value of the analog reading of the ESP32; and MINIMUM_READING, which stores the minimum value of the ESP32 analog reading.
In the code configuration (function void setup()), in addition to the same configurations made in the previous project, we configure the VP pin of the ESP32, connected to the potentiometer of the circuit, as an input on the board.
In the code loop (function void loop()), we declare the variable analog_reading to store the analog reading of the VP pin and then the variable mapped_angle which receives the mapped angle according to the return of the function map(). This last function takes into account the values of the variables analog_reading, MINIMUM_READING, MAXIMUM_READING, MINIMUM_ANGLE and MAXIMUM_ANGLE to calculate a resulting value between 0 and 180º, since the analog reading of the potentiometer returns a value between 0 and 4095. With the angle mapped, the servo axis position is updated with the value stored in the variable mapped_angle.
What Must Happen
After uploading the code to the board, move the potentiometer shaft and notice that the servo shaft will move with it, trying to replicate the potentiometer movement. Along with this, if you like, you can keep track of the potentiometer reading mapping by the serial monitor at 115200 bps.
Going Beyond
The codes in this tutorial are just demonstrations of using the Vespa library functions to control servomotors, however it is possible to implement several functionalities with this simple control of servomotors, for example, to control robotic arms, as shown in the tutorial Web Control of Robotic Arm with the Vespa.
In addition, we also have several other tutorials demonstrating all the features of the Vespa.
Conclusion
In this tutorial we saw the servomotor control functions from the Vespa library and how to use them for servo control.