Beginner Robotics Kit - 4. Software and Drivers
Before continuing, you will need to install some tools on your computer. They will be important when compiling and sending the codes to your robot.
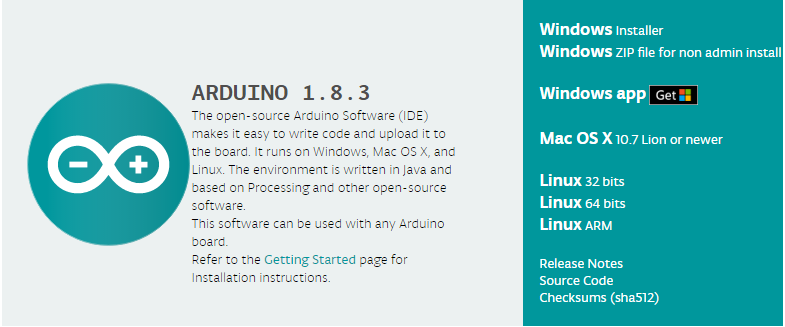
The first step is to install the most current version of the Arduino development environment (IDE), where all the code will be developed. The development environment can be downloaded for free from www.Arduino.cc . For a step-by-step guide on how to perform the installation, see the Tutorial Installing Arduino IDE .
Source: www.Arduino.cc
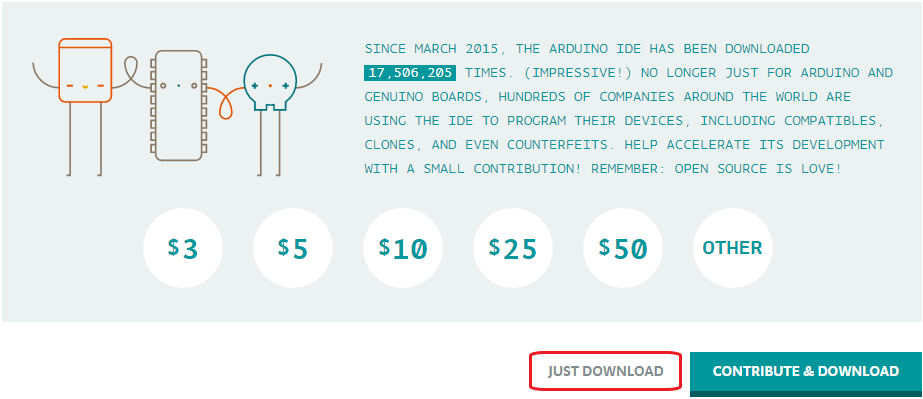
The Arduino IDE is open source software, that is, all of its source code is available here for use and which can be adapted for different purposes. Every time you download from the official software page, a screen appears asking for a donation to help speed up the development of the project. Donating is not mandatory to download, just click JUST DOWNLOAD to download it at no cost.
Source: www.Arduino.cc
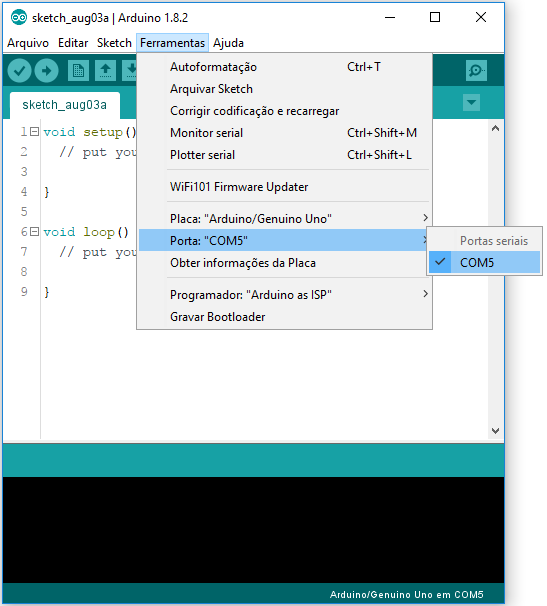
After installing the IDE, you will need to install Julieta's driver. It is necessary for your computer to be able to recognize it, allowing you to send the codes to your robot board. Just follow the tutorial BlackBoard Driver Installation (yes, Julieta V1.0 and BlackBoard UNO R3 V1.1 have the same USB-Serial interface circuit, so you can follow the steps in this tutorial, which Julieta will also be recognized correctly). When the computer recognizes the Arduino board, a communication port is created so that the IDE can communicate with the board. In Windows, you can check the port created by accessing the system's Device Manager. This port will have the name COMx, where x is a number, and this port must be selected in the Arduino IDE, in the Tools > Port menu. On the Mac this port will have a name like /dev/tty.usbmodem X, where x again represents a specific number for the created port. Still in the Tools menu, you must choose your Arduino board. After selecting the correct port, select the Arduino UNO board (since the bootloader used in Julieta's microcontroller is the same as the Arduino UNO).
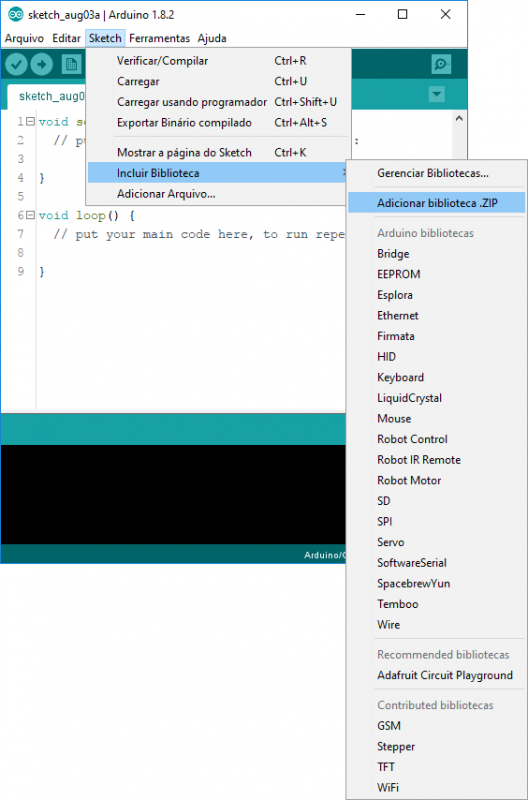
And last but not least, you will also need to install the FalconRobot Library on your Arduino IDE, which contains the examples and functions that will be used during this tutorial.
To do this, first download the library on your computer through this link: FalconRobot Library. Then, go to the menu Sketch-> Include Library-> Add Library .ZIP and select the file you downloaded. You will notice a message stating that the library has been added to your libraries at the bottom of the IDE.
All ready. You are now able to proceed to the next chapter!
Installing the Arduino IDE
The first step is to install the most current version of the Arduino development environment (IDE), where all the code will be developed. The development environment can be downloaded for free from www.Arduino.cc . For a step-by-step guide on how to perform the installation, see the Tutorial Installing Arduino IDE .
Source: www.Arduino.cc
Source: www.Arduino.cc
Installing Julieta's Driver
After installing the IDE, you will need to install Julieta's driver. It is necessary for your computer to be able to recognize it, allowing you to send the codes to your robot board. Just follow the tutorial BlackBoard Driver Installation (yes, Julieta V1.0 and BlackBoard UNO R3 V1.1 have the same USB-Serial interface circuit, so you can follow the steps in this tutorial, which Julieta will also be recognized correctly). When the computer recognizes the Arduino board, a communication port is created so that the IDE can communicate with the board. In Windows, you can check the port created by accessing the system's Device Manager. This port will have the name COMx, where x is a number, and this port must be selected in the Arduino IDE, in the Tools > Port menu. On the Mac this port will have a name like /dev/tty.usbmodem X, where x again represents a specific number for the created port. Still in the Tools menu, you must choose your Arduino board. After selecting the correct port, select the Arduino UNO board (since the bootloader used in Julieta's microcontroller is the same as the Arduino UNO).
Installing the FalconRobot Library
And last but not least, you will also need to install the FalconRobot Library on your Arduino IDE, which contains the examples and functions that will be used during this tutorial.
To do this, first download the library on your computer through this link: FalconRobot Library. Then, go to the menu Sketch-> Include Library-> Add Library .ZIP and select the file you downloaded. You will notice a message stating that the library has been added to your libraries at the bottom of the IDE.
All ready. You are now able to proceed to the next chapter!